
SIMPLE CROCK POT BEEF STEW RECIPE
Hello blog friends. During the winter months I love using my crock pot to make different recipes. It's so easy to use and I love that I don't have to be watching the stove the whole time. I can be doing other things while my meal is cooking away in the crock pot.
I made this stew recently and it tasted so good and everyone loved it. I made egg noodles on the side to go with the meal. The egg noodles were a big hit with everyone especially my teen!

This is one of the dishes my mom used to make for our family back when I was little. It brought back fond memories of all 8 of us gathered around the dinner table for a good hearty meal.
I hope I have inspired you to make beef stew for dinner soon. :)
Please let me know if you make this dish and how you liked it.

Cook time: 4 1/2 hours in crock pot set on HIGH setting or 8 to 9 hours LOW setting
Total time: 4 hours 45 minutes
Hello blog friends. During the winter months I love using my crock pot to make different recipes. It's so easy to use and I love that I don't have to be watching the stove the whole time. I can be doing other things while my meal is cooking away in the crock pot.
I made this stew recently and it tasted so good and everyone loved it. I made egg noodles on the side to go with the meal. The egg noodles were a big hit with everyone especially my teen!

This is one of the dishes my mom used to make for our family back when I was little. It brought back fond memories of all 8 of us gathered around the dinner table for a good hearty meal.
I hope I have inspired you to make beef stew for dinner soon. :)
Please let me know if you make this dish and how you liked it.

SIMPLE CROCK POT BEEF STEW RECIPE
Simple Beef Stew in Crock Pot
This is a super simple beef stew recipe to make in the crock pot.
Prep time: 15 minutesCook time: 4 1/2 hours in crock pot set on HIGH setting or 8 to 9 hours LOW setting
Total time: 4 hours 45 minutes
Calories per serving: 316 calories per serving
Fat per serving: 11 grams total
IngredientsFat per serving: 11 grams total
- 12 ounces - quartered ( about 2 cups) red potatoes
- 4 - cut into 1/2 pieces (2 cups) carrots
- 1 - cut into wedges red onion
- 1 pound beef stew meat
- 1 - 10 3/4 ounce can condensed cream of mushroom soup or cream of celery soup
- 1 cup beef broth
- 1/2 teaspoon dried marjoram or thyme
- 1 9-ounce package frozen cut green beans, thawed
- In a 3 1/2 to 4-quart slow cooker place potatoes, carrots, onion, meat, condensed soup, broth, and spices. Stir to combine.
- Cover; cook on low-heat setting for 8 to 9 hours or on high-heat setting for 4 to 4 1/2 hours. If using low-heat setting, turn to high-heat setting. Stir in thawed green beans. Cover and cook for 10 to 15 minutes more.
** I did not use any red onion in this recipe or the dried marjoram or thyme; instead I used Italian Spices.
** NOTE - This recipe can be be found in the Better Homes and Gardens, Biggest Book of Slow Cooker Recipes.
Thanks for stopping by and I hope you enjoy the end of the week and weekend. Jess and I will see you all back here on Monday for our Cooking and Crafting with J & J Link Up!

Hello blog friends. I hope you are all having a nice week! I have a new place I discovered recently, and I'd love to share it with you. :)
I love visiting and exploring different areas of where I live. There is a new retail shopping area, food hall, and industries/companies, in a huge complex that is called Industry City . It is very new to our area and we decided to take a visit to the food hall.
As you enter the complex, you see this cool Industry City sign.



I walked past this sign and it looked like a cute place that serves bubble tea. Have you ever had bubble tea? I have yet to sample this type of tea!


I love the interesting rope ties that are just outside this store, located towards the top of the ceiling.


Here you can see one of the workers in the factory, making the various chocolates, and working with the machines.


Below is what this outside area looks like in the winter.

Click HERE to see the great parties I will be linking up to!
Thanks everyone and enjoy!
Julie
I love visiting and exploring different areas of where I live. There is a new retail shopping area, food hall, and industries/companies, in a huge complex that is called Industry City . It is very new to our area and we decided to take a visit to the food hall.
As you enter the complex, you see this cool Industry City sign.


My husband and I decided to walk around and look at the different stores and restaurants. We decided to have lunch at Boil Boil Ramen, please take a look at their awesome ramen menu.

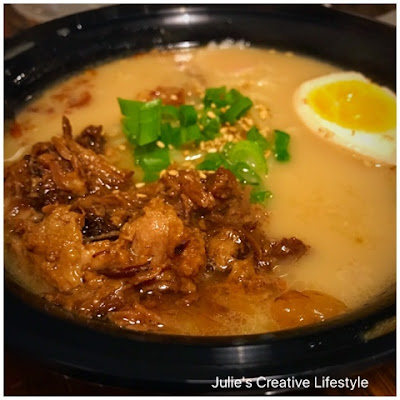
My husband had this wonderful soup called Boil Boil Signature Tonkotsu Ramen.

I had this delicious ramen burger wrapped in seaweed, rice, salad, and pulled pork. It was sooo good!

I walked past this sign and it looked like a cute place that serves bubble tea. Have you ever had bubble tea? I have yet to sample this type of tea!

There is an area where you can buy your food and then sit here to eat it.

I love the interesting rope ties that are just outside this store, located towards the top of the ceiling.

There are these neat areas where you can sit, relax, and drink coffee or tea on comfy chairs and couches. I love the cool industrial feel to this area.

Li-Lac Chocolates factory/store is located here. They have small stores in various locations in New York City where you can buy their delicious chocolates.

Here you can see one of the workers in the factory, making the various chocolates, and working with the machines.

They have the most amazing looking chocolate bunnies that are perfect for Easter.

Here you can see the chocolate hearts already for Valentine's Day. We were able to take and sample many different free chocolates! YUM! 😃

All of the buildings are easy to walk in and out of and have areas outside where you can sit, eat, and drink at tables.
This will be fun to visit and sit outside to eat lunch in the spring and summer. I'm really looking forward to that!

Below is what this outside area looks like in the winter.

Some of these stores are also in this area:
Saks Off 5th
Buy Buy Baby
Harmon Face Values
Bed Bath and Beyond
I had a great time exploring Industry City and I hope you enjoyed my little tour of it!
Have you visited any fun places where you live? I'd love to know.
Thanks so much for stopping by today. I hope you have a nice end of the week and weekend. Jess and I will see you all back here on Monday for our Cooking and Crafting with J & J Link Up!
Click HERE to see the great parties I will be linking up to!
Thanks everyone and enjoy!
Julie

Hello blog friends. I love crocheting in the winter, and I recently crocheted this hat. It was easy to make and I made it very quickly using thick yarn and a large crochet hook.


Click HERE to see the great parties I will be linking up to!
Thanks everyone and enjoy!
Julie

This is my second hat that I have made and I love the way it came out. It looks good on me and it will keep me very warm, just in time for the big snow storm will have this week!
I once crocheted my first hat many years ago and it turned out so bad, that it looked like I had made a shower cap! LOL! Since then I was very hesitant to make another one.
I was in Michael's shopping and I came across this book, called Quick - Crochet, Complete Instructions for 8 Style HATS.
This book was very helpful and I picked out a pattern called Super Bulky Hat. The yarn I used is super bulky and thick, which is great for making a hat to keep you warm in the winter.

I chose thick dark purple yarn from Loops & Threads, Charisma.

Once again I'm glad I challenged myself to try and make another hat. I found it easy to make, with simple instructions to follow, and the hat is crocheted in the round. I am very happy with the way this hat turned out and it looks like a hat!
SUPER BULKY HAT
PATTERN: Found in the book Quick - Crochet, Complete Instructions for 8 Styles HATS.
HOOK: US Size 15/P (10mm)
YARN: Super Bulky Weight Wool Yarn 132 yards
(I used Loops & Threads-Charisma, 109 yards, Color: Dark Purple)

** This crochet hat book is available at Michael's and can be ordered online at Amazon.
I hope I've inspired you to crochet your own hat for the winter!
To see more of my crochet patterns and creations, you can click HERE.
Thanks for stopping by, and I hope you enjoy the end of the week and weekend. Jess and I will see you all back here on Monday for our Cooking and Crafting with J & J.
Click HERE to see the great parties I will be linking up to!
Thanks everyone and enjoy!
Julie

Hello blog friends. I hope you are all enjoying the week. I'm enjoying this mild winter we are having with hardly any snow! During the week I love making easy and delicious meals for dinner.
I recently made this dish of Beans and Rice, when it was requested by my teen and husband. This is such an easy, and economical meal to make for dinner. I'd love to share with you how easy this recipe is to make.
Below the beans are simmering away in the pot. I made this with brown rice, but you can use white rice or even egg noodles to go with this dish.

BEANS AND RICE RECIPE

Beans and Rice Recipe
This is an easy, delicious, and economical meal to make for dinner.
Ingredients
- 1-15.5 oz. can red kidney beans
- 1-15.5 oz. can black beans
- 1-15 oz. can tomato sauce
- 1 green pepper, chopped small
- 1 tablespoon garlic, minced
- to taste salt and pepper
- to taste Italian seasoning
- 2 cups cooked rice
Instructions
1. In a large pot ad minced garlic tomato sauce, and chopped pepper.
2. Rinse both cans of beans and add them to the pot.
3. Add seasonings to pot and mix everything together.
4. Cook until everything starts to boil. Reduce heat and cook for 30 minutes.
5. Serve bean mixture on top of cooked rice.
Details
Prep time: Cook time: Total time: Yield: 6 to 8 servingsThis makes a great week night meal that tastes great, and can be ready to eat in minutes!
Thanks for stopping by and I hope you enjoy the end of the week and weekend. Jess and I will see you all back here on Monday for our Cooking and Crafting with J & J Link Up!
Click HERE to see the great parties I will be linking up to!
Thanks everyone and enjoy!
Julie

Hello friends. I thought that I would do a fun makeup post since I haven't done one in a while.
In the beginning of the year I love sorting through and organizing my makeup. I throw out what is old, or what I have not used in a while.
After sorting through my makeup, I realized that I needed new mascara, eyeshadow primer, and dry shampoo. I bought a new cover stick (concealer), and an eyebrow shaping set.
Here are the items I bought:

Click HERE to see the great parties I will be linking up to!
Thanks everyone and enjoy!
Julie
In the beginning of the year I love sorting through and organizing my makeup. I throw out what is old, or what I have not used in a while.
After sorting through my makeup, I realized that I needed new mascara, eyeshadow primer, and dry shampoo. I bought a new cover stick (concealer), and an eyebrow shaping set.
Here are the items I bought:


1) L'Oreal Volumnous Mascara - This is a new mascara that I tried and I love it. My lashes came out looking long and there is no flaking or clumping. I like using black mascara and I sometimes use brown/black.
2) Urban Decay Eyeshadow Primer Potion - I never used eyeshadow primer util my daughter recommended it to me after she told me numerous times that my eyeliner was worn off and smudged in spots. When I use this eyeshadow primer, my eyeliner stays on all day with no smudges. I also like that my eyeshadow stays on all day as well. I would defiantly recommend this product.
3) NYC Cover Stick - I absolutely love this cover stick and I use this for under my eyes and around the top of my eye area. I also apply this over my lips when I wear lipstick. Doing that usually makes my lipstick stay on and last longer. I also use a lip liner too.
4) Not Your Mothers Clean Freak Refreshing Dry Shampoo, Unscented - I love this dry shampoo and it's one of my favorites. To read my post on dry shampoo, you can click HERE.
5) EcoTools Brow Shaping Set - I like how the eyebrow brush works and I use it to brush my eyebrow hairs to stand up straight. I like using the other brush to apply eye shadow, but this could also be used to apply color to your eyebrows.
I bought all of these beauty products at ULTA Beauty. It was my first time visiting this store, and I really liked it. ULTA Beauty has everything you need for all of your beauty essentials, at great prices.
When was the last time you went through and sorted out your makeup?
Thanks for stopping by and hope you enjoy the end of the week and weekend. Jess and I will see you all back here on Monday for our Cooking and Crafting with J & J Link Up!
Click HERE to see the great parties I will be linking up to!
Thanks everyone and enjoy!
Julie

Hello blog friends. I have this super easy recipe to make pancake muffins, that I'd love to share with you!
PANCAKE MUFFINS
I found this recipe from our weekly, Monday, Cooking and Crafting with J & J Link Up, that I co-host with Jess from Plucky's Second Thought. This recipe was shared by Acadiana's Thrifty Mom and I had to try it.
The recipe is so easy to make and they taste great. I love this fun idea of making pancakes in muffin tins! I added about 3 small pieces of banana to each muffin, and they taste great with maple syrup.
Since I last made these banana pancake muffins, I have made the pancake muffins using bacon which tasted really good and with blueberries that were also good. After making all three types of muffins, I like the cooked bacon added to the mixture the best!

PANCAKE MUFFINS RECIPE
SUPPLIES YOU WILL NEED:
- Pancake Batter - I used Betty Crocker Bisquick Mix
- Your favorite add ins - blueberries, strawberries, bananas, nutella, chocolate chips, sausage, bacon pieces, etc.
- Muffin tin (12)
- Non-stick cooking spray
INGREDIENTS TO MAKE PANCAKES:
- 2 cups Betty Crocker Bisquick Mix
- 1 cup Milk - I used Almond Milk
- 2 eggs
* This makes enough for 12 muffins
DIRECTIONS:
DIRECTIONS:
- Mix all the ingredients together.
- Spray each muffin hole with non-stick cooking spray.
- Fill each hole 1/4 full with pancake batter.
- Add in your favorite add in on top.
- Bake in the oven at 350 degrees for 12 minutes.
- When done baking serve with maple syrup.
- Done.
I hope you all enjoy this easy way to make pancakes. Have fun making them with your favorite add in! Please let me know if you make the muffins and if you liked them.
Thanks for stopping by and hope you enjoy the end of the week and weekend.
Subscribe to:
Posts (Atom)


Social Icons